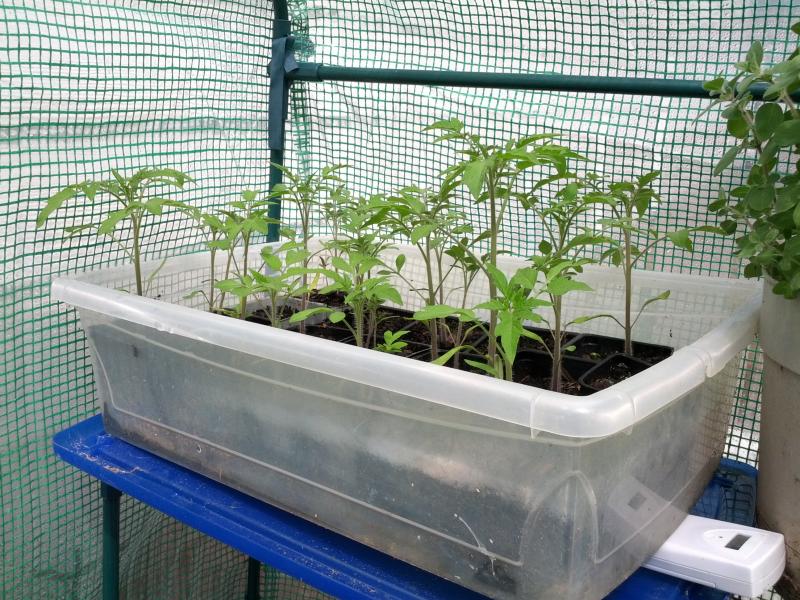
I got rid of my greenhouse the other day. It was in pretty sad shape. Snow and ice caused it to collapse back in 2014. I did what I could to fix it and it made it through last year. Then we got more snow this year and it was pretty much done.
It had a large hole in the corner which caused to not hold heat.
On top of all of that, the zippers on the door were shot.
So... The greenhouse went away. I'm hoping to get another one at some point. I want something with some structure that can withstand some snow. I'd also like something with roof vents to release the heat and not cook the plants. I started seeds this year without using the greenhouse at all, so maybe I can get by without one.
Showing posts with label greenhouse. Show all posts
Tuesday, May 12, 2015
Saturday, March 29, 2014
Greenhouse Climate Control or: How I learned to Stop Worrying About My Plants Freezing.
Keeping plants from freezing in the greenhouse is always a concern in the winter. I've seen my greenhouse get to 100* during the day and at night it'll drop into the 30's. It just doesn't retain any heat. To deal with this I bought a thermostatically controlled outlet from Amazon. Supposedly it comes on at 35* and goes off at 45*.
I don't really trust it. I haven't been able to test it to confirm that it actually comes on at 35*. Not to mention that that is awfully close to freezing. Even if it does come on and the temperature is dropping fast, the greenhouse might not heat up in time to keep the plants alive.
The red thermostatically controlled outlet is supposed to come on at 78* and got off at 70*. I was actually outside one day and heard the fans shut off. I checked the temperature in the greenhouse and it was 67*. That's 3 degrees off from what it's supposed to be (assuming my other thermometer is correct). I can live with that for fans, not for the heat.
As a result of this I've had to manually turn the heater on at night and off in the morning. That's really inconvenient.
I found the solution in the home brewing community. Home brewers need to keep their fermentation vessels at a specific temperature and there's a nifty device called an STC-1000 that will do just that. There are a lot of forum posts, blogs, and youtube videos on how to use the thing. I went by this one.
The STC-1000 has a temperature sensor and two relays. It turns one one for heat and other to cool. It's exactly what I needed.
I also needed an old computer power cord, a receptacle, a wall plate, wire, a wire nut, and a 6x4x2 project box from Radio Shack.
The first step was to cut holes in the project box. I used a Dremel to cut a hole in the lid for the receptacle and a hole in the end of the box for the STC-1000.
I broke off the tab connecting the top and bottom plugs on the receptacle. This allows them to be controlled independently. One will come on for the heat and the other to cool. I used the wiring diagram found here.
The sensor wire and power cord were run through rubber grommets. Getting the grommets in and the cords through them was probably the most challenging part of this entire build.
Here it is powered up for the first time.
I put the sensor into my chest freezer and watched the display immediately drop. I was pleased with how fast it reacted. One of the few downsides this thing has is that it only displays temperatures in Celsius. Programming the thing was a pain too. The directions that came with it were badly translated. I couldn't decipher them. Luckily Google knows everything (or at least where to find it).
I set the temperature on it to 4.4*C which is 40*F. I plugged a light into the heat outlet, put the sensor in the freezer and waited. When the panel hit the desired 4.4* the light came on.
Then I wanted to figure out how to set the temperature for the other outlet. I wanted the fans to come on at 75*F or 23.8*C. Well, it doesn't work that way. You can only set one temperature. When the sensor drops below that the heat relay comes on. If it's above that the cold relay turns on. That's not exactly what I wanted, but I can work with it.
My solution was to continue using the red thermostatically controlled outlet that I already had. I plugged it into the cold outlet. I plugged the heater and a light bulb into the hot outlet. The light will make it easy for me to know when the heat is on.
Having it come on at 40*F should give the heater plenty of time to warm up before the temperature drops further. It'll also save me electricity and money by shutting off at 40*. I won't have to leave it on all night and heat the greenhouse to 48-50*. I'm very excited about this. Of course, we're fast approaching our last frost date so it may not get used at all. Oh well, there's always next year.
Bonus tomato picture:
It's a good thing that we're getting close to our last frost date. These things have gotten huge!
I don't really trust it. I haven't been able to test it to confirm that it actually comes on at 35*. Not to mention that that is awfully close to freezing. Even if it does come on and the temperature is dropping fast, the greenhouse might not heat up in time to keep the plants alive.
The red thermostatically controlled outlet is supposed to come on at 78* and got off at 70*. I was actually outside one day and heard the fans shut off. I checked the temperature in the greenhouse and it was 67*. That's 3 degrees off from what it's supposed to be (assuming my other thermometer is correct). I can live with that for fans, not for the heat.
As a result of this I've had to manually turn the heater on at night and off in the morning. That's really inconvenient.
I found the solution in the home brewing community. Home brewers need to keep their fermentation vessels at a specific temperature and there's a nifty device called an STC-1000 that will do just that. There are a lot of forum posts, blogs, and youtube videos on how to use the thing. I went by this one.
The STC-1000 has a temperature sensor and two relays. It turns one one for heat and other to cool. It's exactly what I needed.
I also needed an old computer power cord, a receptacle, a wall plate, wire, a wire nut, and a 6x4x2 project box from Radio Shack.
The first step was to cut holes in the project box. I used a Dremel to cut a hole in the lid for the receptacle and a hole in the end of the box for the STC-1000.
I set the temperature on it to 4.4*C which is 40*F. I plugged a light into the heat outlet, put the sensor in the freezer and waited. When the panel hit the desired 4.4* the light came on.
My solution was to continue using the red thermostatically controlled outlet that I already had. I plugged it into the cold outlet. I plugged the heater and a light bulb into the hot outlet. The light will make it easy for me to know when the heat is on.
Bonus tomato picture:
It's a good thing that we're getting close to our last frost date. These things have gotten huge!
Wednesday, February 26, 2014
Repairing the Greenhouse
We had some snow the other day and it caused the roof of my greenhouse to collapse.
I thought about getting another one, but that would cost $80-100. Instead I decided that I should attempt to repair it.
I went to Home Depot and picked up ten 10' sections of 1/2 PVC pipe and a number of 'T' and corner connectors.
I started by removing all of the bent and damaged parts of the greenhouse.
Then I created two arches out of the PVC pipe. One for the front and one for the rear.
I used zip ties to connect the arches to what was left of the greenhouse structure. The shelves are still usable.
Then I added a section of pipe to connect the front arch to the rear arch. I don't know if this was really needed or not. I had the pipe and the fittings so I figured why not.
The final step was to create the ridge beam to hold up the center of the roof. I used a 4-way cross in the rear. This allowed me to run a center support down to the ground.
Here's a view of the front. It does not have the center support. It would have made getting in and out too difficult.
Here's what it looked like when finished. I think it'll work.
It was a tight fit to get the plastic back on. I managed to rip a hole in the corner that I fixed temporarily with duct tape (as seen in the picture above). The duct tape didn't work real well and I had to sew the corner with some thread.
When I conceived of this project I imagined all kinds of cross bracing. As I was putting it together I realized that it was going to be unnecessary. Simpler was better. That also means that I have a bunch of PVC pipe and fittings left over. Oh well, I'll probably find something to do with them.
I thought about getting another one, but that would cost $80-100. Instead I decided that I should attempt to repair it.
I went to Home Depot and picked up ten 10' sections of 1/2 PVC pipe and a number of 'T' and corner connectors.
I started by removing all of the bent and damaged parts of the greenhouse.
Then I created two arches out of the PVC pipe. One for the front and one for the rear.
I used zip ties to connect the arches to what was left of the greenhouse structure. The shelves are still usable.
Then I added a section of pipe to connect the front arch to the rear arch. I don't know if this was really needed or not. I had the pipe and the fittings so I figured why not.
The final step was to create the ridge beam to hold up the center of the roof. I used a 4-way cross in the rear. This allowed me to run a center support down to the ground.
Here's a view of the front. It does not have the center support. It would have made getting in and out too difficult.
Here's what it looked like when finished. I think it'll work.
It was a tight fit to get the plastic back on. I managed to rip a hole in the corner that I fixed temporarily with duct tape (as seen in the picture above). The duct tape didn't work real well and I had to sew the corner with some thread.
When I conceived of this project I imagined all kinds of cross bracing. As I was putting it together I realized that it was going to be unnecessary. Simpler was better. That also means that I have a bunch of PVC pipe and fittings left over. Oh well, I'll probably find something to do with them.
Saturday, February 15, 2014
Greenhouse + Snow = Bad news...
We had snow this past week. Luckily I can work from home. So I was not one of those people stuck on the roads for hours. Anyway, we got about 5" of snow and after that it rained. When I went out to check on the chickens the next day I noticed that my greenhouse had collapsed. This made me sad.
Fortunately I didn't have any plants in there. I got a shovel and removed the snow so I could investigate the damage. It was bad. Some of the metal rods were bent in half and most of the plastic brackets had snapped. I'm not sure if it's salvageable. I need to figure out something soon though. I just started seeds and I'm going to need some place for them to go once they get bigger.
Wednesday, May 8, 2013
Back to the greenhouse
About a month ago I took all of the plants from my greenhouse and put them in my garden. At the time I had been waiting for the weather to get warm enough that I wouldn't have to worry about the plants freezing. That hasn't been an issue. It's hardly gotten down into the 40's at night. But, it also hasn't been warm or sunny during the day. We've had several weeks of rain and clouds and no sun. As a result, my plants just don't seem to be doing that well. (Well, they aren't growing as fast as I had hoped. Maybe I'm just to impatient to be a gardener.)
The picture below shows what I am talking about. The pepper plant in the back is tall and has a lot of leaves. It's the only one. The rest of the peppers in the bed look like the ones in the front, tiny, with few leaves, and turning yellow.
So what do I do about this? I decided to start more seeds. It's kind of late to be doing that, but better late than never. If it does turn out to be too late then I might have to buy plants.
I stopped on my way home from work and picked up potting soil. I've used garden soil and top soil in the past. I thought I'd try potting soil this time and see if it works any better. Then I dug out all of my containers and the few remaining peppers that I hadn't transplanted yet. They've been living in a tuperware bin next to one of the raised beds.
I filled some nice sized pots and potted up the remaining pepper plants. I debated about where these should go. Should I leave them outsize or put them back in the greenhouse. Eventually I opted to put them in the greenhouse. I already have peppers in the garden that are struggling. Maybe leaving them in the greenhouse longer will give them a better chance.
I filled two tuperware bins with 4" pots. One bin contains peppers and the other Roma tomatoes.
Now I wait. With any luck, the plants in the garden beds will take off, these seeds will sprout, and I'll have more plants than I know what to do with. That's a good problem to have.
The picture below shows what I am talking about. The pepper plant in the back is tall and has a lot of leaves. It's the only one. The rest of the peppers in the bed look like the ones in the front, tiny, with few leaves, and turning yellow.
So what do I do about this? I decided to start more seeds. It's kind of late to be doing that, but better late than never. If it does turn out to be too late then I might have to buy plants.
I stopped on my way home from work and picked up potting soil. I've used garden soil and top soil in the past. I thought I'd try potting soil this time and see if it works any better. Then I dug out all of my containers and the few remaining peppers that I hadn't transplanted yet. They've been living in a tuperware bin next to one of the raised beds.
I filled some nice sized pots and potted up the remaining pepper plants. I debated about where these should go. Should I leave them outsize or put them back in the greenhouse. Eventually I opted to put them in the greenhouse. I already have peppers in the garden that are struggling. Maybe leaving them in the greenhouse longer will give them a better chance.
I filled two tuperware bins with 4" pots. One bin contains peppers and the other Roma tomatoes.
Now I wait. With any luck, the plants in the garden beds will take off, these seeds will sprout, and I'll have more plants than I know what to do with. That's a good problem to have.
Friday, March 29, 2013
Seeding starting update - March
I moved some things around in the greenhouse today. The plants seem to be doing well. I'm ready for the cold weather to be done so I can get them in the ground.
![]() |
| Oregano |
![]() |
| I have so much oregano that I put this outside hoping that the chickens would eat it. They did not. |
![]() | |
| I'm not even sure what I have in here. |
![]() |
| Tomatoes |
![]() |
| I think these are mostly peppers. Who knows if they are hot or sweet. |
![]() |
| These are hot peppers. They are just taking forever to do anything. |
![]() |
| Lettuce |
![]() |
| More lettuce. I should probably thin this out. |
![]() |
| Lettuce on top and bottom left. Bottom right is more oregano. |
Wednesday, March 13, 2013
Seed starting update.
![]() |
| Oregano |
![]() |
| Kale, cabbage, dill, and who knows what else. |
![]() |
| Lettuce on the top and lower left. Oregano on the bottom right. |
![]() |
| More oregano. |
![]() |
| Hot peppers on top and lettuce underneath. |
![]() |
| Tomatoes |
The peppers are taking forever. I started those seeds in my garage on January 15. They are just now starting to develop their second set of leaves.
I really really need to start labeling things when I start them. I always think that I'll remember what I put where. That never happens. Some day I'll learn my lesson.
Tuesday, February 26, 2013
New Greenhouse
My wife got me a greenhouse for Christmas.
According to the specs on the Agri Supply web site, it is 55" wide, 57" deep and has a center height of 76". Assembly wasn't difficult, but it was time consuming. I think it took me the better part of 90 minutes to put it together. The entire thing is made out of metal tubes that fit together with plastic joints. All of the shelving was included.
You can see from the picture below that there is a fair amount of space inside. The white tub on the floor contains 17 gallons of water. This (in theory at least) acts as a heat sink. It gets warm during the day and releases the heat at night. I also have a heater and a small fan in there. I picked up the heater at Home Depot a few years ago. They were ~$50 or so during the winter. I picked one up on clearance at the end of the season for $12. I couldn't turn it down for that price. I never really used it until I got this greenhouse.
Here is what automates the system and allows me to keep my hands off. I have a green extension cord running into the greenhouse. Into that I plugged in a 3-way orange adapter which I found at Harbor Freight for $1.99. Walmart, Lowes, Home Depot have them too, but Harbor Freight was the cheapest. Moving on, I installed two thermostatically controlled outlets. The grey one comes on at 35 and goes off at 45. The heater is plugged into it. The fan is plugged into the red one which comes on at 78 and goes off at 70.
Here's a better view of the shelves hold various containers.
This temperature and humidity sensor allows me to monitor what is going on from the base unit in the house. I don't remember what the ambient temperature was outside that day, but you can see that it was 95* in the greenhouse. I've seen it get as high as 112*.
Here's the bin of tomato seeds that I started in the garage the other day. They seem to be doing OK so far.
I haven't been using the greenhouse for very long, so it'll be interesting to see how well it works.
According to the specs on the Agri Supply web site, it is 55" wide, 57" deep and has a center height of 76". Assembly wasn't difficult, but it was time consuming. I think it took me the better part of 90 minutes to put it together. The entire thing is made out of metal tubes that fit together with plastic joints. All of the shelving was included.
You can see from the picture below that there is a fair amount of space inside. The white tub on the floor contains 17 gallons of water. This (in theory at least) acts as a heat sink. It gets warm during the day and releases the heat at night. I also have a heater and a small fan in there. I picked up the heater at Home Depot a few years ago. They were ~$50 or so during the winter. I picked one up on clearance at the end of the season for $12. I couldn't turn it down for that price. I never really used it until I got this greenhouse.
Here is what automates the system and allows me to keep my hands off. I have a green extension cord running into the greenhouse. Into that I plugged in a 3-way orange adapter which I found at Harbor Freight for $1.99. Walmart, Lowes, Home Depot have them too, but Harbor Freight was the cheapest. Moving on, I installed two thermostatically controlled outlets. The grey one comes on at 35 and goes off at 45. The heater is plugged into it. The fan is plugged into the red one which comes on at 78 and goes off at 70.
Here's a better view of the shelves hold various containers.
This temperature and humidity sensor allows me to monitor what is going on from the base unit in the house. I don't remember what the ambient temperature was outside that day, but you can see that it was 95* in the greenhouse. I've seen it get as high as 112*.
Here's the bin of tomato seeds that I started in the garage the other day. They seem to be doing OK so far.
I haven't been using the greenhouse for very long, so it'll be interesting to see how well it works.
Subscribe to:
Posts (Atom)