Sunday, December 30, 2012

Barley Fodder

I read about barley fodder on the Internet a short time ago.  I thought it was fascinating so I had to give it a try.  The idea is simple.  Put some barley seed in a tray and keep it moist.  You want it wet, but not sitting in water.  It'll rot.

I called up a local gardening/home brew store and ordered some barley seed.  It was $0.75/lbs.  I got 10 lbs.


I started by putting seeds in a tray.  I actually used the lid to one of those seed starting trays.  I drilled holes in one end so the water would drain out.  I put it over the edge of the sink.


Then I waited.  Not much happened for the first 2 days.  On day 3 I saw sprouts. 


It was only 50* or so in the garage.  I put my seed heating mat under the tray and grow lights on top. 


Then things really took off.  The picture below was taken on day 6.

And here it is at day 8.  It didn't grow as well on the right side.  I'm guessing that is because the heating mat didn't reach that far. 

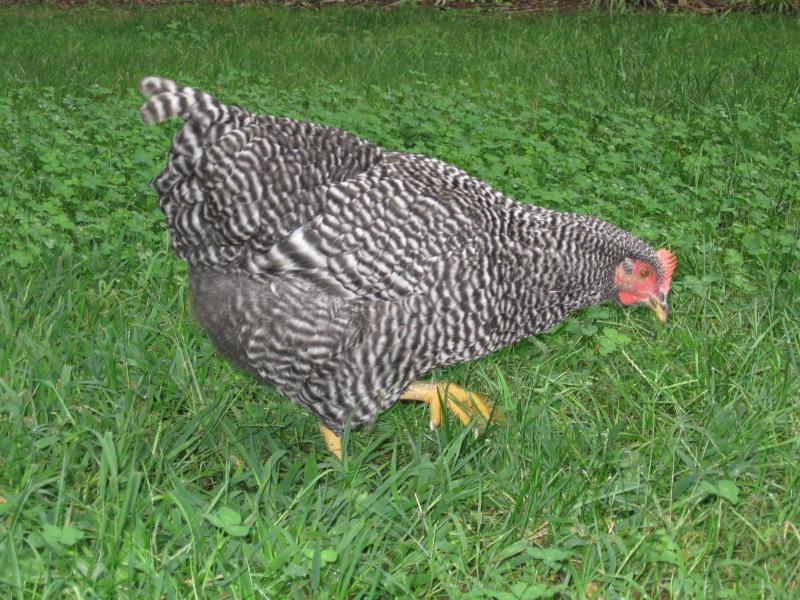
The chickens seemed to really enjoy the stuff.


Did I have any issues?  Yes.  I noticed a bad smell in the garage.  When I pulled some of the fodder out for the chickens I found a layer of seeds on the bottom of the tray that had not sprouted.  They looked like they were rotting.  They were slimy and smelled very bad.  When I try this again I'm going to start with a lot fewer seeds in the tray.  I think I made a layer that was too thick. 

Sunday, December 9, 2012

Rain Barrels

I've been looking for rain barrels for a while.  I was able to find a cheap source of them on craigslist.


I already had one rain barrel.  It came with the house.  Now I have 3 more. 

I leveled the ground and put down stone block.  This got the barrels high enough that I'd be able to get a bucket or other watering device under them.

The two pictured above are on either side of my screened in porch.  The one below is at the front corner of the house.

Collecting rain water in some states is illegal.  Luckily, I don't live in those states.  Here in North Carolina it is perfectly legal to collect rain water. 

Saturday, December 1, 2012

Compost Update


I originally filled the compost bin to the top.  You can see in the picture that it settled and compacted quite a bit.  And this is after I added more to fill it back to the top.


I was very happy to see that my compost reached 140* near the bottom of the pile.  This tells me that this system is working.

 After a few weeks I moved the compost from one side to the other.  This in theory puts oxygen into the pile and helps it break down better.  The stuff on the top was light and easy to move.   The stuff on the bottom was heavy and compacted.  I probably could have taken it straight out and put it in the garden.  It looked like great compost.

I've already had a ton of leaves come down in my back yard.  So I've filled the original bin again.  This picture is from the back of the compost bin.  The one on the left is full of fresh leaves, chicken manure, and grass clippings.  The bin on the right is full of finished compost.


How do I know that the stuff on the right is finished?  I checked the temperature.  It got down to 24* the other night.  During the day it got into the 50's. The bin on the left was just over 100* while the bin on the right was only 60*.

I'm rather pleased with the new compost bins.  I still have the little black plastic bin that I bought a few years ago.  I haven't been impressed with it.  It takes far too long for stuff to compost in it.  I think it's due to the fact that it just doesn't hold enough.  That and it's really difficult to turn over the material in it.  You can see it in the picture below.  Note the giant pile of leaves on the right.   Those are what didn't fit in the compost bins, and I'm not done getting all of the leaves out of my yard. 

Wednesday, October 24, 2012

Compost bins

The previous owner of my house left this compost bin (if you can call it that).  It's just some welded wire fence in a circle.  There's no structure to it.  It worked well for a while.  I got a lot of good compost out of it last year and re-filled it over this past summer.  As you can see, it hasn't held up. 


I decided to build something more substantial.  The previous owners also left an old swing.  I cut it up and saved the 4x4's from it.  Then I went to Home Depot and bought 2x4 lumber from the scrap bin.  Most of it was warped and twisted and only 6 ft long.  It was sufficient for what I wanted to do. 

This is what I came up with.  It has two bins.  The plan is to fill one side and let it sit for a while and then move it to the other side. 

I bought some plastic 1" netting and stapled it around the interior.  At $20 it was the most expensive part of the project.

I built a removable door to hold the stuff in.

Bungee cords keep the door in place.

Here it is with one side all filled up.

Monday, October 22, 2012

More chickens

We got more chickens.  One of our neighbors had some chickens that she was trying to give away.  We gladly took more.  We doubled what we had and went from 4 to 8.

I wish I could remember what breed they are, but I don't know.

This is Autumn

This is Copper.  She's probably the prettiest bird we have.  She's also the smallest.

This is Peanut.

And this is Mulan.

My children named all of the birds.  It took a few days for the new birds to settle in.  Autumn didn't leave the coop the first day and hide under it most of the second day.  Peanut made herself at home and joined right in with the 4 birds that we had.  Copper and Mulan stuck together.  They were smaller and were chased away by the larger birds.  It took a week or two for everyone to adjust.

I've heard about chickens having a pecking order.  It was fascinating to see it in action.  The barred rock, Padme, is at the top, and poor Copper is at the bottom.  Even her buddy Mulan now pecks at her. 

Speaking of the other birds...  They're much bigger now.

Padme - Barred Plymoth Rock

Ariel - Rhode Island Red

Leia - Silkie

Jasmine - Buff Brahma

Leia was the first to lay an egg.  Padme, and Autumn are also laying and we think that Peanut might be laying as well.  We haven't been able to catch her in the act to be sure.  I'm not really keeping track, but I think we get 1-2 eggs per day. 

Monday, September 10, 2012

Eggs (finally!)

We finally have eggs!  We've been searching for eggs all over the yard for the last week.  Today my kids noticed not one, but two in the coop!  Of course they were in the furthest, hardest to reach corner and not in the nesting box.

We don't know which chicken laid them, or when.  I'm guess that one was laid yesterday and the other today. 

This is exciting.  Hopefully we'll have more soon.


Tuesday, September 4, 2012

Front yard hugelkultur

One of my chickens started to become an escape artist.  The chickens like to hang out on my wood pile.  While there, the barred rock was hopping the fence.  (The wood pile is there from some sweet gum trees that I had taken down last spring.)


I had put the wood here with the intention of splitting it.  I made a few lame attempts to split some of it.  It hasn't dried out enough yet, and it was hard work. 

The solution?  Put in a front yard hugelkultur bed.

I had tomatoes planted here last spring, but they didn't do too well.  This area of the yard didn't get much sun once the leaves came in.  The soil is downright awful here.  It's basically sand.  I put down a few inches of compost for the tomatoes, but I don't think it was enough.  Anyway, I plan on using this for a fall garden. 

I started by raking the area and clearing all of the loose material.  Then I placed the logs on the ground kept them away from the property line.  Next I added compost, five wheel barrow loads. 


Obviously I'm going to need more compost. 

The idea behind hugelkultur is to minimize irrigation requirements.  The wood on the bottom will decompose and in the process become very sponge like.  As a result, it'll hold a lot of water.  Then you plant in the soil/compost above and the plants roots will be able to get the moisture retained below.  It's a popular permaculture concept.  If you think about it, it's how nature works.  A tree falls on the ground and starts to rot.  Insects and fungus help to break it down.  Leaves fall on top of it and also decompose.  Eventually plants grow out of whatever remains.

I'll have to wait and see how it works.  Until then, the wood pile has been reduced in size.  With any luck the chicken will no longer jump over the fence.

One final picture from the front door.  I wonder what the neighbors are going to say about this.

Wednesday, August 8, 2012

Chicken coop finished.

The roof of the nesting boxes is in place in this picture.  You can't tell from the picture, but I bevelled the front edge so it sits flush against the wall.


The first sheet of plywood is on the roof.

I finished the roof with some OSB and attached the plywood to the front wall.

The door has been hung and a latch will keep the chickens in and the critters out.

The door on the end will allow me to access the coop to clean it.

Two latches keep the door closed.
 The pine shavings have been installed.
 The birds on their first night in the new coop.  The first two nights they went into their old coop and I had to transfer them.  After that they figured it out and went in the new coop on their own.

The roof of the nesting boxes is hinged.  That'll make getting the eggs easier.
 Finally, I installed a nice ramp for them.

The roof was shingled and the entire coop was primed and painted.