Wednesday, August 8, 2012

Chicken coop finished.

The roof of the nesting boxes is in place in this picture.  You can't tell from the picture, but I bevelled the front edge so it sits flush against the wall.


The first sheet of plywood is on the roof.

I finished the roof with some OSB and attached the plywood to the front wall.

The door has been hung and a latch will keep the chickens in and the critters out.

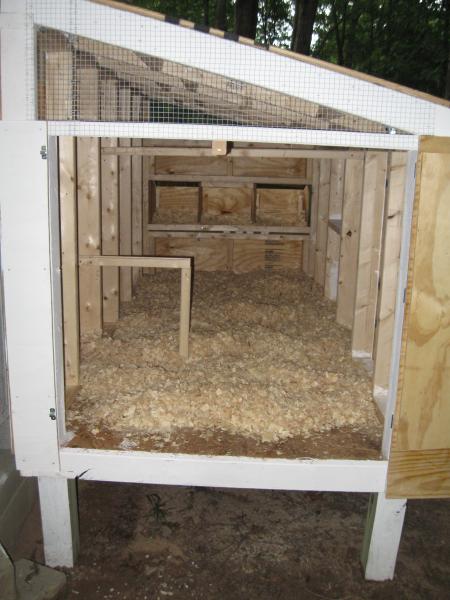
The door on the end will allow me to access the coop to clean it.

Two latches keep the door closed.
 The pine shavings have been installed.
 The birds on their first night in the new coop.  The first two nights they went into their old coop and I had to transfer them.  After that they figured it out and went in the new coop on their own.

The roof of the nesting boxes is hinged.  That'll make getting the eggs easier.
 Finally, I installed a nice ramp for them.

The roof was shingled and the entire coop was primed and painted.  

Sunday, August 5, 2012

Chicken coop cont.

The chicken coop continued... The nesting boxes and roof.

I made three nesting boxes out of some scrap OSB that I had laying around.


The rafters for the roof are notched 2x4's.  Then ends are cut at angles.  A miter saw would have made this a lot easier, but I managed with a circular saw.

Rafters in place with blocking in between them.  I also used hurricane ties at each end to hold them to the walls.

Here's a view from the inside.

I put chicken wire over both ends.  This should help keep the critters out.


More chicken wire mesh on the ends will allow for lots of ventilation.

I haven't mentioned it so far, but most of the structure was primed with white primer.  Hopefully that'll help protect it from the elements. 

Wednesday, August 1, 2012

Chicken coop

The chickens are no longer small.  They needed bigger housing, so I built a new chicken coop.

I placed my order through Home Depot's web site and got an email when it was ready.  That was the way to do.  There was no need to wander up and down the aisles and pull stuff off.  They did it all, and then they loaded it into my vehicle.  I had to drive with my knees in the dash, but 4x8 sheets of plywood do fit in a Kia Sedona.

I started by building the floor.  It measures 4x8.  

Here it is with 4x4 lets attached.  It's on a level spot behind the shed.  This keeps it somewhat out of site.  

For the floor I used a sheet of half inch OSB.

The back wall was essentially the same as the floor.  It's 4' high.

Here's the back wall attached to the floor and held in place by some extra 2x4's.

The front wall is 3' high

The design more or less came from a book my wife picked up, "Chicken Coops for Dummies."  That book had a design for a basic 4x4' coop.  I doubled that and made mine 4x8'.  The nesting boxes I built were different too, but I'll get to those later.