One of me coworkers is a home brewer. The other day he mentioned that he was getting ready to make a batch. So I asked him what he did with the spent grain and could I have it. He said I could as long as I provided him with a container. I gave him a 5-gallon bucket.
He filled my 5-gallon bucket and a third of a 6-gallon bucket as well.
I dumped out what was in the 6-gallon bucket and the chickens went nuts.
It was pretty much all gone the next morning.
The grain in the 5-gallon bucket lasted a little longer.
I'm hoping that I can get more spent grain in the future. It's a free way to supplement their feed.
Wednesday, September 11, 2013
Sunday, September 8, 2013
Rabbit set back.
We lost a rabbit last night. I'm not sure what happened.
I was in the yard with my kids after church. My daughter went to check on the rabbits. She came back and said, "Mister isn't moving. I think he might be dead."
So I went to check and sure enough he wasn't moving. Ugh. I did notice over the past week or so that he wasn't eating much. Misses needed her feeder filled every day. He didn't need his filled nearly as often. It was the same story with the water and hay. She was going through both far faster than he was. He was probably sick and we just didn't know it. He was active and hopping around his cage. He wasn't lethargic or anything. So who knows...
My kids are taking it fine. When I asked my daughter, she said she was upset a little bit. She isn't showing it at all. So she's dealing with it well. I'm bummed. I hate to lose another animal. I've already informed the dog that she isn't allowed to die.
![]() |
| RIP buddy. We hardly knew you. |
So I went to check and sure enough he wasn't moving. Ugh. I did notice over the past week or so that he wasn't eating much. Misses needed her feeder filled every day. He didn't need his filled nearly as often. It was the same story with the water and hay. She was going through both far faster than he was. He was probably sick and we just didn't know it. He was active and hopping around his cage. He wasn't lethargic or anything. So who knows...
My kids are taking it fine. When I asked my daughter, she said she was upset a little bit. She isn't showing it at all. So she's dealing with it well. I'm bummed. I hate to lose another animal. I've already informed the dog that she isn't allowed to die.
Friday, September 6, 2013
Eventually it will be fall. Time for knitting!
A few years ago, I took up knitting. Like most crafts, I pick it up for a while, and then put it down for a long while, and I rarely actually finish anything.

I did, however, finish a dress for my niece...

and a skirt for my daughter.
And I'm drooling over some yarns I've found online, though I'll probably just go to a local big box craft shop when I'm actually ready to buy to make it most economical.
I did, however, finish a dress for my niece...
and a skirt for my daughter.
I've never managed to finish anything for myself. But a little while back, I saw a post on the Polyface Hen House blog about a Mystery Summer Shawl Knit Along. I was truly inspired! So when I saw Sherri post about the newest Mystery Fall Knit Along, I was intrigued and decided to join in!
For all the information about the knit along, check out the blog at WPKnits!
I've purchased the pattern and, inspired by Sherri's blog post, I've started compiling some color inspiration and yarn ideas.
If you saw my house, you'd know fall colors are my absolute favorites, so I couldn't stray too far for this project...
And I'm drooling over some yarns I've found online, though I'll probably just go to a local big box craft shop when I'm actually ready to buy to make it most economical.
If you're a knitter and interested in following along, you can find me on Ravelry! C'mon over and let me know what you're working on!
Thursday, September 5, 2013
Grilled Tomatillo Salsa
I celebrated a birthday this past week, and since I spent the whole day in the car on the way home from vacation, a home-cooked dinner of favorites just wasn't in the cards. For something quick and easy, but dairy and gluten-free, we went to Moe's for the first time ever. Everyone liked the food, and especially the many salsas!
So, when I contemplated what to do with the mountain of tomatillos and peppers our garden was producing, I decided to try replicating the smoky spiciness of Moe's.
The result may not have been just like theirs, but it was absolutely delicious!
Grilled Tomatillo Salsa
1/3 bag mesquite wood chips
6 cups tomatillos (hulled, and halve anything bigger than a ping-pong ball)
1/4 red onion (quarter through root end so the quarter you're grilling stays intact)
4-6 jalapeno peppers (or other favorite hot pepper)
2 + 2 cloves of garlic
1 bunch cilantro
2 cups fresh tomatoes
1 lime
2 teaspoons + 1/2 teaspoon kosher salt
1 teaspoon cumin
1 tablespoon Frank's RedHot
Water
Olive Oil
We stopped at Home Depot and picked up a bag of mesquite wood chips. I dumped about 1/3 of the chips into a bowl and covered them with water.
After about an hour (ok, two... I got distracted), I dumped off the water and put about 3/4 of the wood chips into an aluminum foil packet, into which I poked holes to allow the smoke to escape.
I heated the grill and threw the packet of wood chips on there (medium high heat) while I prepped the vegetables.
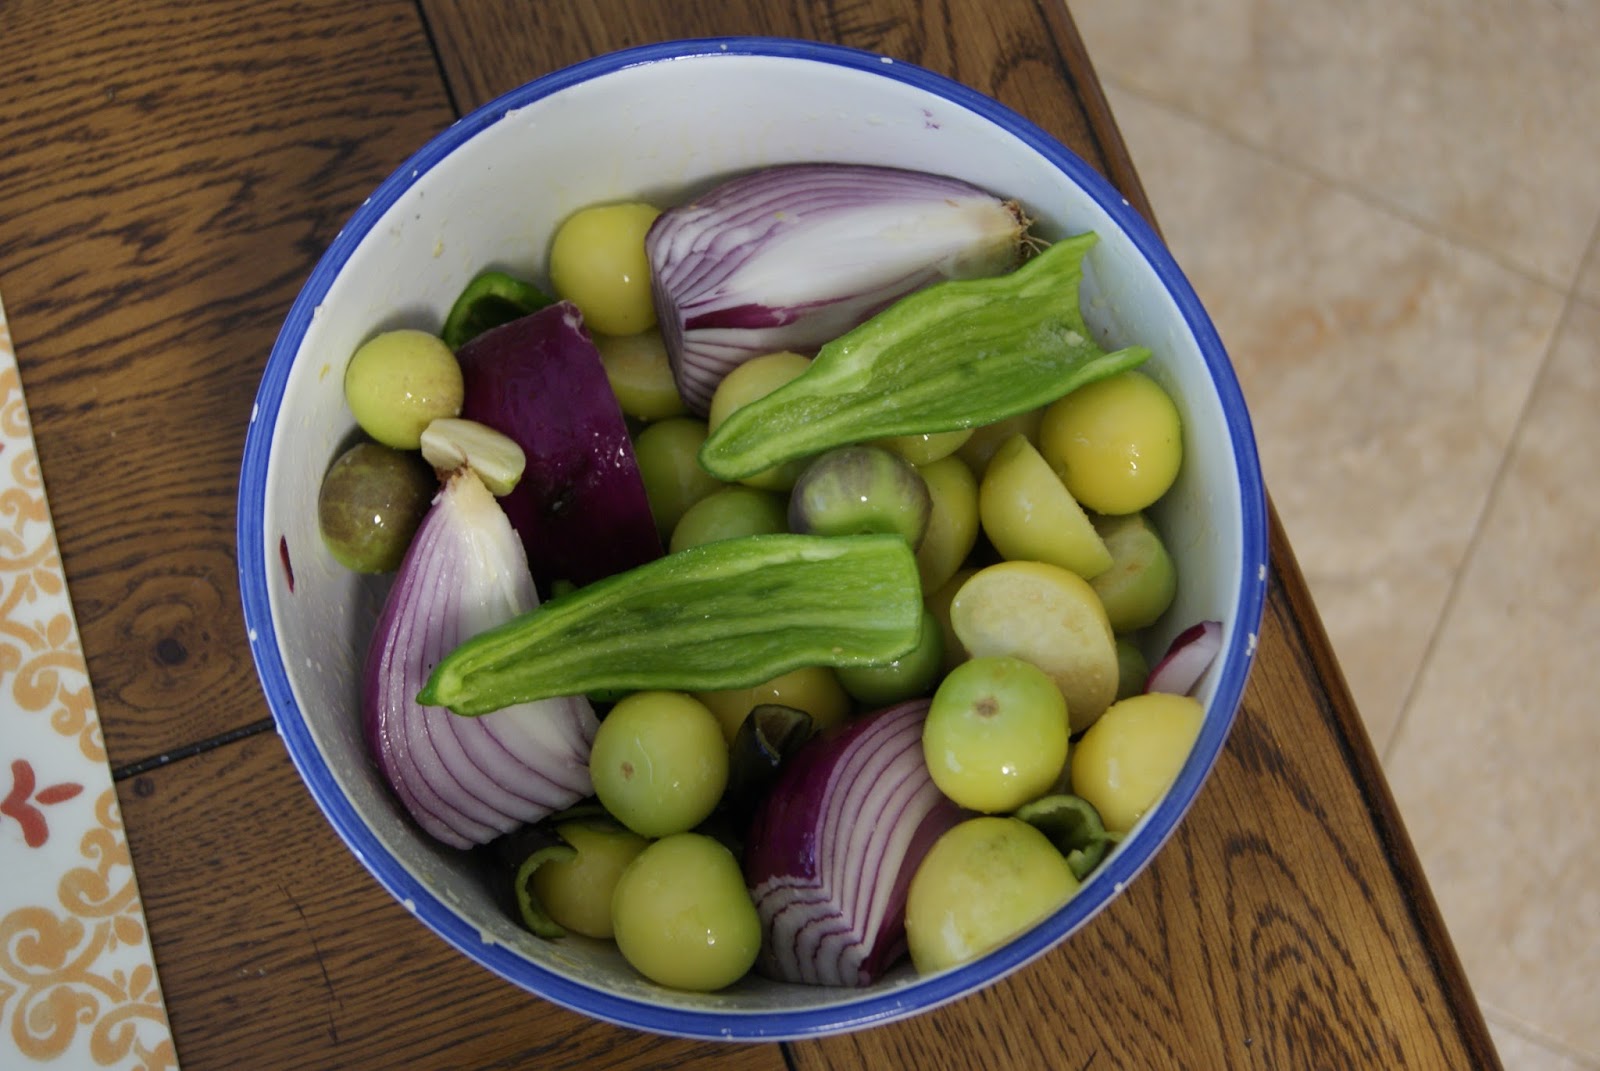
The tomatillos were peeled, and I halved the larger ones, quartered the onion, halved and seeded the peppers, and peeled 2 cloves of garlic. Then I drizzled everything with some extra-virgin olive oil and sprinkled with 1/2 teaspoon of salt. I left a handful of tomatillos, 2 more cloves of garlic and all of the tomatoes out of the bowl for later.
Once the grill was heated, I realized I wasn't getting much steam/smoke out of the wood chip packet, so I cut a slit in the top and peeled back some of the foil, then I laid the veggies in a single layer on a grill pan, turned the heat to low, and closed the lid.
I let the vegetables get brown on one side (about 10 minutes), then I gave them a toss, moved the pan to the top rack and the smoke packet directly underneath, cranked the heat up a little and closed the lid again.
After another 15 minutes, everything was cooked down nicely. I removed the veggies from the grill and put them in a bowl in the refrigerator for a couple of hours. After they'd cooled down, and released a good bit of liquid, I drained everything and put it in the food processor. I had to process it in batches, and then mix it all together at the end. To the last batch, I added the remaining tomatillos and garlic, as well as the tomatoes, cilantro and juice of one lime.
Once it was all processed, I put it in a bowl and folded it together, adding in the last 2 teaspoons of salt, the cumin and Frank's Red Hot. Then we let it chill again for a bit while we put some ribs on the grill over the still-smoking packet of wood chips.
This is one of the best salsas we've ever made, and the best part is that it is a great use for the tomatillos our garden is producing like crazy!
Wednesday, September 4, 2013
Overflow rain barrels in action.
We got some heavy rain the other night. I was anxious to see how well my overflow barrels worked. I waited for the rain to let up a bit and went out to check. To my surprise, overflow barrel #2 hardly had anything in it.
Originally I had attached irrigation tubing to the lower overflow of the barrel at the corner of my house and ran it to overflow barrel #2. I think the 1/2" tubing is a real bottleneck. It just doesn't have the ability to transfer water very quickly. So I moved the tubing from the overflow to the hose bib (pictured above). This worked. My overflow barrel was full in the morning.
Overflow barrel #3 was full as well. The float valve worked and stopped the flow of water into the barrel.
Great! With this setup I can fill both of my overflow barrels. The downside is that I can't get any water out of the barrel at the corner of my house. Luckily I already had a solution. I bought a 5-way hose manifold from Amazon the other day knowing that I'd find a use for it somewhere.
Now I can get water out of this barrel and it's plumbed to my regular rain barrels and my overflow barrels. I thought everything was great. Then I looked in the barrel and noticed that it wasn't full. I checked the barrels under my other downspouts. They were 8-10" low too. I thought to myself, "Huh. That's odd." Then I realized what I had feared had actually happened. Overflow barrel #2 is lower than the rest of the barrels. The water flowed from the higher barrels to the lower one and exited through its overflow until they all reached the same level.
I thought of a few ways to deal with this. I could put a hose cap on the over flow. I have doubts about how well this would work. When water enters the barrel the air needs a way to escape. The lid on that barrel is solid with just a few 1/16" holes for drainage. That may be enough, but it may not.
My next thought was to install another float valve and still fill the barrel from the bottom. When the water is low the valve would be open and would allow the air out. When the water got high enough the valve would close and no more air would escape. The problem with this is that I don't have any more float valves and I'm too impatient to wait for another one to arrive.
I ended up doing the third thing I thought of. I've attached PVC pipe to the overflows on my previous barrels. They let me direct the water away from the house. Well, I figured I could just do the same thing. Only this time I'd point the pipe towards the sky.
This will allow air to escape the barrel as it fills and it raises how high the water has to be before it'll overflow. It is possible that it could still penetrate the holes in the lid and overflow that way. I'm hoping that it doesn't. I'll just have to wait and see what happens. The only option I have after that is raising the barrel. I really don't want to do that. I want to keep it out of sight.
Originally I had attached irrigation tubing to the lower overflow of the barrel at the corner of my house and ran it to overflow barrel #2. I think the 1/2" tubing is a real bottleneck. It just doesn't have the ability to transfer water very quickly. So I moved the tubing from the overflow to the hose bib (pictured above). This worked. My overflow barrel was full in the morning.
Overflow barrel #3 was full as well. The float valve worked and stopped the flow of water into the barrel.
Great! With this setup I can fill both of my overflow barrels. The downside is that I can't get any water out of the barrel at the corner of my house. Luckily I already had a solution. I bought a 5-way hose manifold from Amazon the other day knowing that I'd find a use for it somewhere.
Now I can get water out of this barrel and it's plumbed to my regular rain barrels and my overflow barrels. I thought everything was great. Then I looked in the barrel and noticed that it wasn't full. I checked the barrels under my other downspouts. They were 8-10" low too. I thought to myself, "Huh. That's odd." Then I realized what I had feared had actually happened. Overflow barrel #2 is lower than the rest of the barrels. The water flowed from the higher barrels to the lower one and exited through its overflow until they all reached the same level.
I thought of a few ways to deal with this. I could put a hose cap on the over flow. I have doubts about how well this would work. When water enters the barrel the air needs a way to escape. The lid on that barrel is solid with just a few 1/16" holes for drainage. That may be enough, but it may not.
My next thought was to install another float valve and still fill the barrel from the bottom. When the water is low the valve would be open and would allow the air out. When the water got high enough the valve would close and no more air would escape. The problem with this is that I don't have any more float valves and I'm too impatient to wait for another one to arrive.
I ended up doing the third thing I thought of. I've attached PVC pipe to the overflows on my previous barrels. They let me direct the water away from the house. Well, I figured I could just do the same thing. Only this time I'd point the pipe towards the sky.
This will allow air to escape the barrel as it fills and it raises how high the water has to be before it'll overflow. It is possible that it could still penetrate the holes in the lid and overflow that way. I'm hoping that it doesn't. I'll just have to wait and see what happens. The only option I have after that is raising the barrel. I really don't want to do that. I want to keep it out of sight.
Monday, September 2, 2013
Ducks at two months.
The ducks have grown a lot in the last two months. When we got them they looked like this.
Now they look like this.
Ducks are interesting. They stick together. The chickens will wonder off and do their own thing. If one of the ducks gets separated from the others it'll freak out. They're really a tight group. I wonder how that's going to work when they start laying. They aren't as friendly as the chickens either. I can get close to the chickens and as long as I don't try to pick them up they are fine. The ducks freak out if you get within 10 feet of them. My only complaint with them is the freaking out. Khaki Campbells are supposed to be quiet ducks. These guys talk a lot! Most of the time it's not too loud. It's just a constant, "quack quack quack." But once in a while, or if they get spooked, they'll let out a big loud honk.
Anyway, it's apparent in the picture above that the ducks are a little big for the original tub we got. So it was time for another one. I picked up a large mixing tub at Home Depot. The first one held 10 gallons. This one is twice as big and holds 20. My son had to test it out on the patio. Let me tell you... Emptying those 20 gallons of water was a chore... One that he didn't do.
I connected the float valve to on the tub to the rain barrel next to my shed.
I installed a 1/2" PVC pipe with ball valve for a drain. I documented how I did this on the first tub for the ducks.
As for housing... I moved the old chicken tractor into the area with the coop. The ducks have been staying in it.
Here's a picture of the entire area. Duck house/tractor on the left, coop in the middle, and duck water on the right (in the corner).
![]() |
| July 3, 2013 |
![]() |
| September 2, 2013 |
Anyway, it's apparent in the picture above that the ducks are a little big for the original tub we got. So it was time for another one. I picked up a large mixing tub at Home Depot. The first one held 10 gallons. This one is twice as big and holds 20. My son had to test it out on the patio. Let me tell you... Emptying those 20 gallons of water was a chore... One that he didn't do.
I like to automate things as much as possible. That meant putting a float valve on the new tub.
Then I moved the tub to the back corner of the yard by the chicken coop. We have this area fenced off. This gives us the ability to keep the birds contained in a smaller space if the need arises. I connected the float valve to on the tub to the rain barrel next to my shed.
I installed a 1/2" PVC pipe with ball valve for a drain. I documented how I did this on the first tub for the ducks.
I don't know how long it took for the tub to fill. I opened the valve in the evening and in the morning the tub was full.
I haven't seen the ducks try the new tub yet. They still prefer the other one. Of course, it's in the middle of the yard and the new one is back in the corner. Obviously I'm more likely to see them in the old one.As for housing... I moved the old chicken tractor into the area with the coop. The ducks have been staying in it.
Here's a picture of the entire area. Duck house/tractor on the left, coop in the middle, and duck water on the right (in the corner).
There's one more thing that I have to share. It's a video of the ducks in the water.
Sunday, September 1, 2013
End of summer garden maintenance.
Since I've got plenty of tomatillos and my tomatoes are done, I decided to clear out two of my raised beds.
I know when I initially filled the raised beds they were full. The soil must have settled. Nearly every bed is low. Luckily Home Depot had garden soil on sale for Labor Day. I picked up 12 bags. It probably won't be enough but it'll do for now. I should have more compost ready to use in the spring. I'll use it to fill whatever I can't get done now.
I think I added 3 bags to this bed. The bed that had the tomatoes wasn't too bad so I let it be. It's possible that all of the leaves in there made it look more full than it was.
My next project was filling my 3x4 bed. I went around my yard and found all of my container plants. The ones that were done are nearly dead (herbs mostly) got dumped into the raised bed. I'm not sure how well this will work. Some of those containers had a lot of root mass. I could stand on the little pot shaped mounds of dirt and they didn't break apart. I'm hoping that they break down and decompose over the winter.
I dumped the soil from two of my self watering 5-gallon buckets into the 3x4 raised bed. It was interesting to see what they looked like inside. Both buckets were full of really wet soil. It was like really thick mud. The tomatillos that were in them didn't do well at all. There were hardly any roots. I'm guessing that I didn't use the right kind of soil in them.
The one bucket didn't hold up well at all. I threw it out. If I decide to use them again next year I'll have to make a new one.
I used 2 bags of garden soil to fill in the rest of the bed.
This means that my container plants are back in my driveway.
Oh well, at least there are fewer of them now.
I put 4 bags of garden soil in my garage for later use. I know my 2x4 bed needs additional soil, but right now it's full of beans. I also need to fill all of the containers that I emptied. And I'm going to need soil for starting seeds next year. Yes, it's barely September and I'm already thinking about starting seeds next year.
![]() |
| I left some oregano in the corner of the one bed. |
I think I added 3 bags to this bed. The bed that had the tomatoes wasn't too bad so I let it be. It's possible that all of the leaves in there made it look more full than it was.
My next project was filling my 3x4 bed. I went around my yard and found all of my container plants. The ones that were done are nearly dead (herbs mostly) got dumped into the raised bed. I'm not sure how well this will work. Some of those containers had a lot of root mass. I could stand on the little pot shaped mounds of dirt and they didn't break apart. I'm hoping that they break down and decompose over the winter.
![]() |
| The soil from two of my self watering buckets went in here too. |
![]() |
| Here's the stack of empty pots. I plan to fill them with fresh soil and move them to the greenhouse. |
The one bucket didn't hold up well at all. I threw it out. If I decide to use them again next year I'll have to make a new one.
I used 2 bags of garden soil to fill in the rest of the bed.
I had been storing a lot of my container plants in my most recent 4x8 bed. I moved them out so I could add 3 bags of garden soil to it.
This means that my container plants are back in my driveway.
Oh well, at least there are fewer of them now.
I put 4 bags of garden soil in my garage for later use. I know my 2x4 bed needs additional soil, but right now it's full of beans. I also need to fill all of the containers that I emptied. And I'm going to need soil for starting seeds next year. Yes, it's barely September and I'm already thinking about starting seeds next year.
Subscribe to:
Posts (Atom)